We have now published Katrin Berges' new portfolio site!
We've worked on this for some time, and shes been eager to release the site as fast as possible, And now it's here!
She does hand drawn illustration of the mystical kind.
Journal
We have now published Katrin Berges' new portfolio site!
We've worked on this for some time, and shes been eager to release the site as fast as possible, And now it's here!
She does hand drawn illustration of the mystical kind.
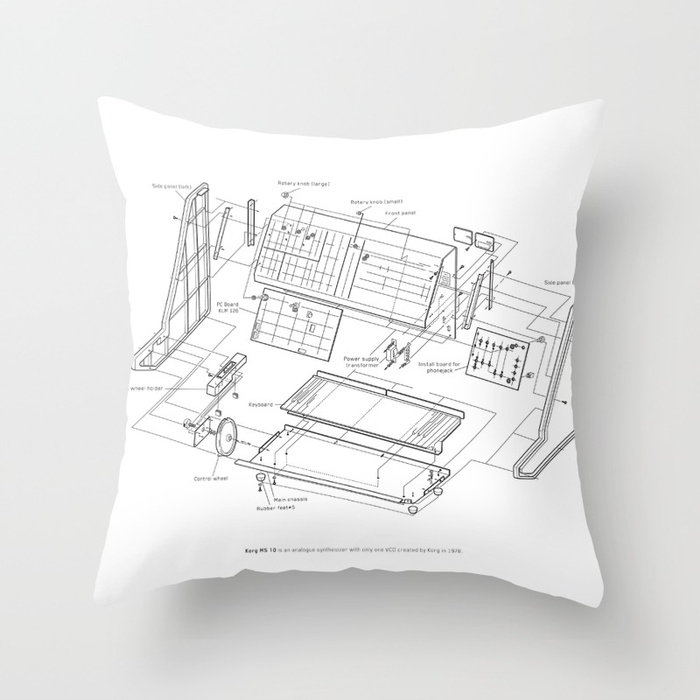
For some time now I wanted to be able to sell som prints. And I startes to use one of those print on demand and went for Society 6. As a bonus they not only make prints of your artwork but also, make t-shirts, cups, rugs, and so on.
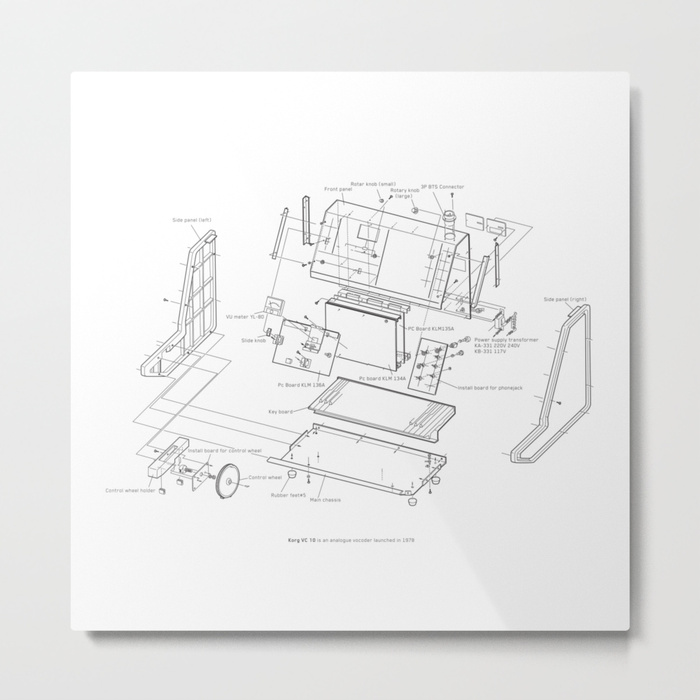
First up I have published a series of three prints, all 70s Korg synthesizers in an exploded diagram view. The first illustration were made in 2008, and I did a screen print version of a Korg MS-20
I also found the technical drawings for Ms-10 and VC-10 (the vocoder).
I came over a problem with the Arnold Hair. You can see in the picture that the hair doesn't pick up the color from the texture, and as usual it's an easy fix.
You add an Arnold Tag, and tick the Export UVs. In the hair material you add your texture to the standard hair shader.
Good luck!
Sometimes your texture is almost 100% seamless and tileable. But small differences in light and shadow easily show that this is a tiled texture and it's a 3D image. As humans we always look for patterns and they are easily spotted and by equalizing the texture you make it more believable.
You find the free texture pack here:
If you have a material suggestion, write it in the comments :)
Sometimes your texture is almost 100% seamless and tileable. But small differences in light and shadow easily show that this is a tiled texture and it's a 3D image. As humans we always look for patterns and they are easily spotted and by equalizing the texture you make it more believable.
In this follow up tutorial on how to create Object ID for your fabrics, I only use Photoshop to create these maps. This really depends on your source texture and other element if it's easy or hard. Sometimes you need to do a lot of small tweaking to make it work, and here I show you the main principles.
In this follow up tutorial on how to create Object ID for your fabrics I use only Photoshop to create these maps. This really depends on your source texture and other element if it's easy or hard. Sometimes you need to do a lot of small tweaking to make it work, and here I show you the principles.
If you haven't seen Fabulous Fabrics I recommend you do that :)
Poliigon has started creating fabric textures with Object ID maps. They add a more convincing look on your fabric, and they are really easy to create your self. In Arnold render you can connect these to the coat layer in standard surface (Arnold 5) and I really like the result that gives.
You find the free texture pack here:
I came across this video on repetition and why we should do it to learn. In school we are often presented with an idea/concept ones. Maybe repeated ones more if we're tested on the subject and no more. That knowledge doesn't stick. So my tip is find resources presented from different angles and repeat. And see this video :)
Cover Photo by WonHo Sung on Unsplash
Poliigon has started creating fabric textures with Object ID maps. They add a more convincing look on your fabric, and they are really easy to create your self. In Arnold render you can connect these to the coat layer in standard surface and I really like the result that gives.
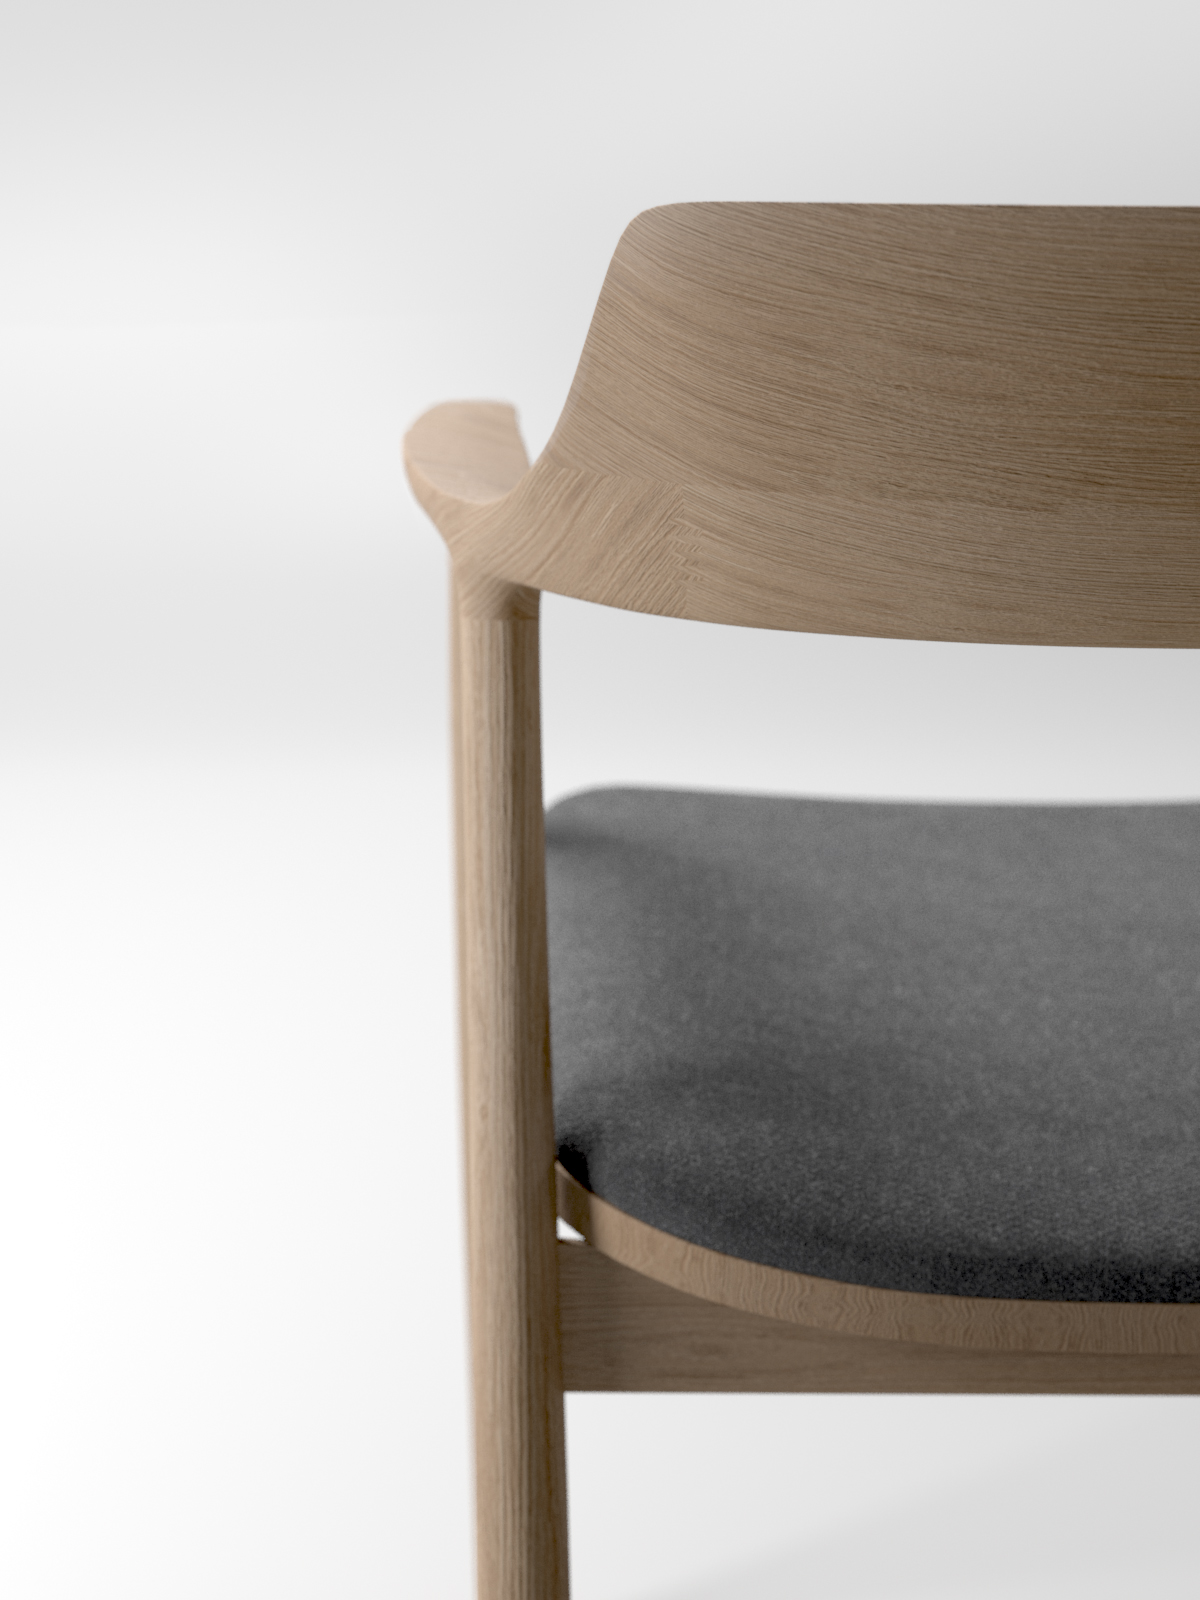
I show how I used it to create a wool material for a Hiroshima Chair by Naoto Fukasawa.
If you have a material suggestion, write it in the comments :)
Here is the free Fleece texture: https://www.poliigon.com/texture/2332
(and I have nothing to do with their site :)
Cinema 4D https://www.maxon.net/en/
Arnold Render https://www.solidangle.com/
Photoshop/Illustrator http://www.adobe.com/
Poliigon has started creating fabric textures with Object ID maps. They add a more convincing look on your fabric, and they are really easy to create your self. In Arnold render you can connect these to the coat layer in standard surface and I really like the result that gives.
I've just posted a fan 3d render of the Hiroshima Arm Chair.
You can see the images here or go to the page here